
Kit 14 - Reversing Gear, Water Pump Bypass.
I contacted STW in January to see what progress had been made on my remaining kits. I received word that while the boiler and related kits were still underway, Kit 14 - The Reversing Lever, Parking Brake and Water Pump Bypass were ready to ship.
I received the kit in late January and separated the kit into sections, sending some parts out to get powder coated.


Two weeks later the parts are back, so now I need to wait for warmer weather.
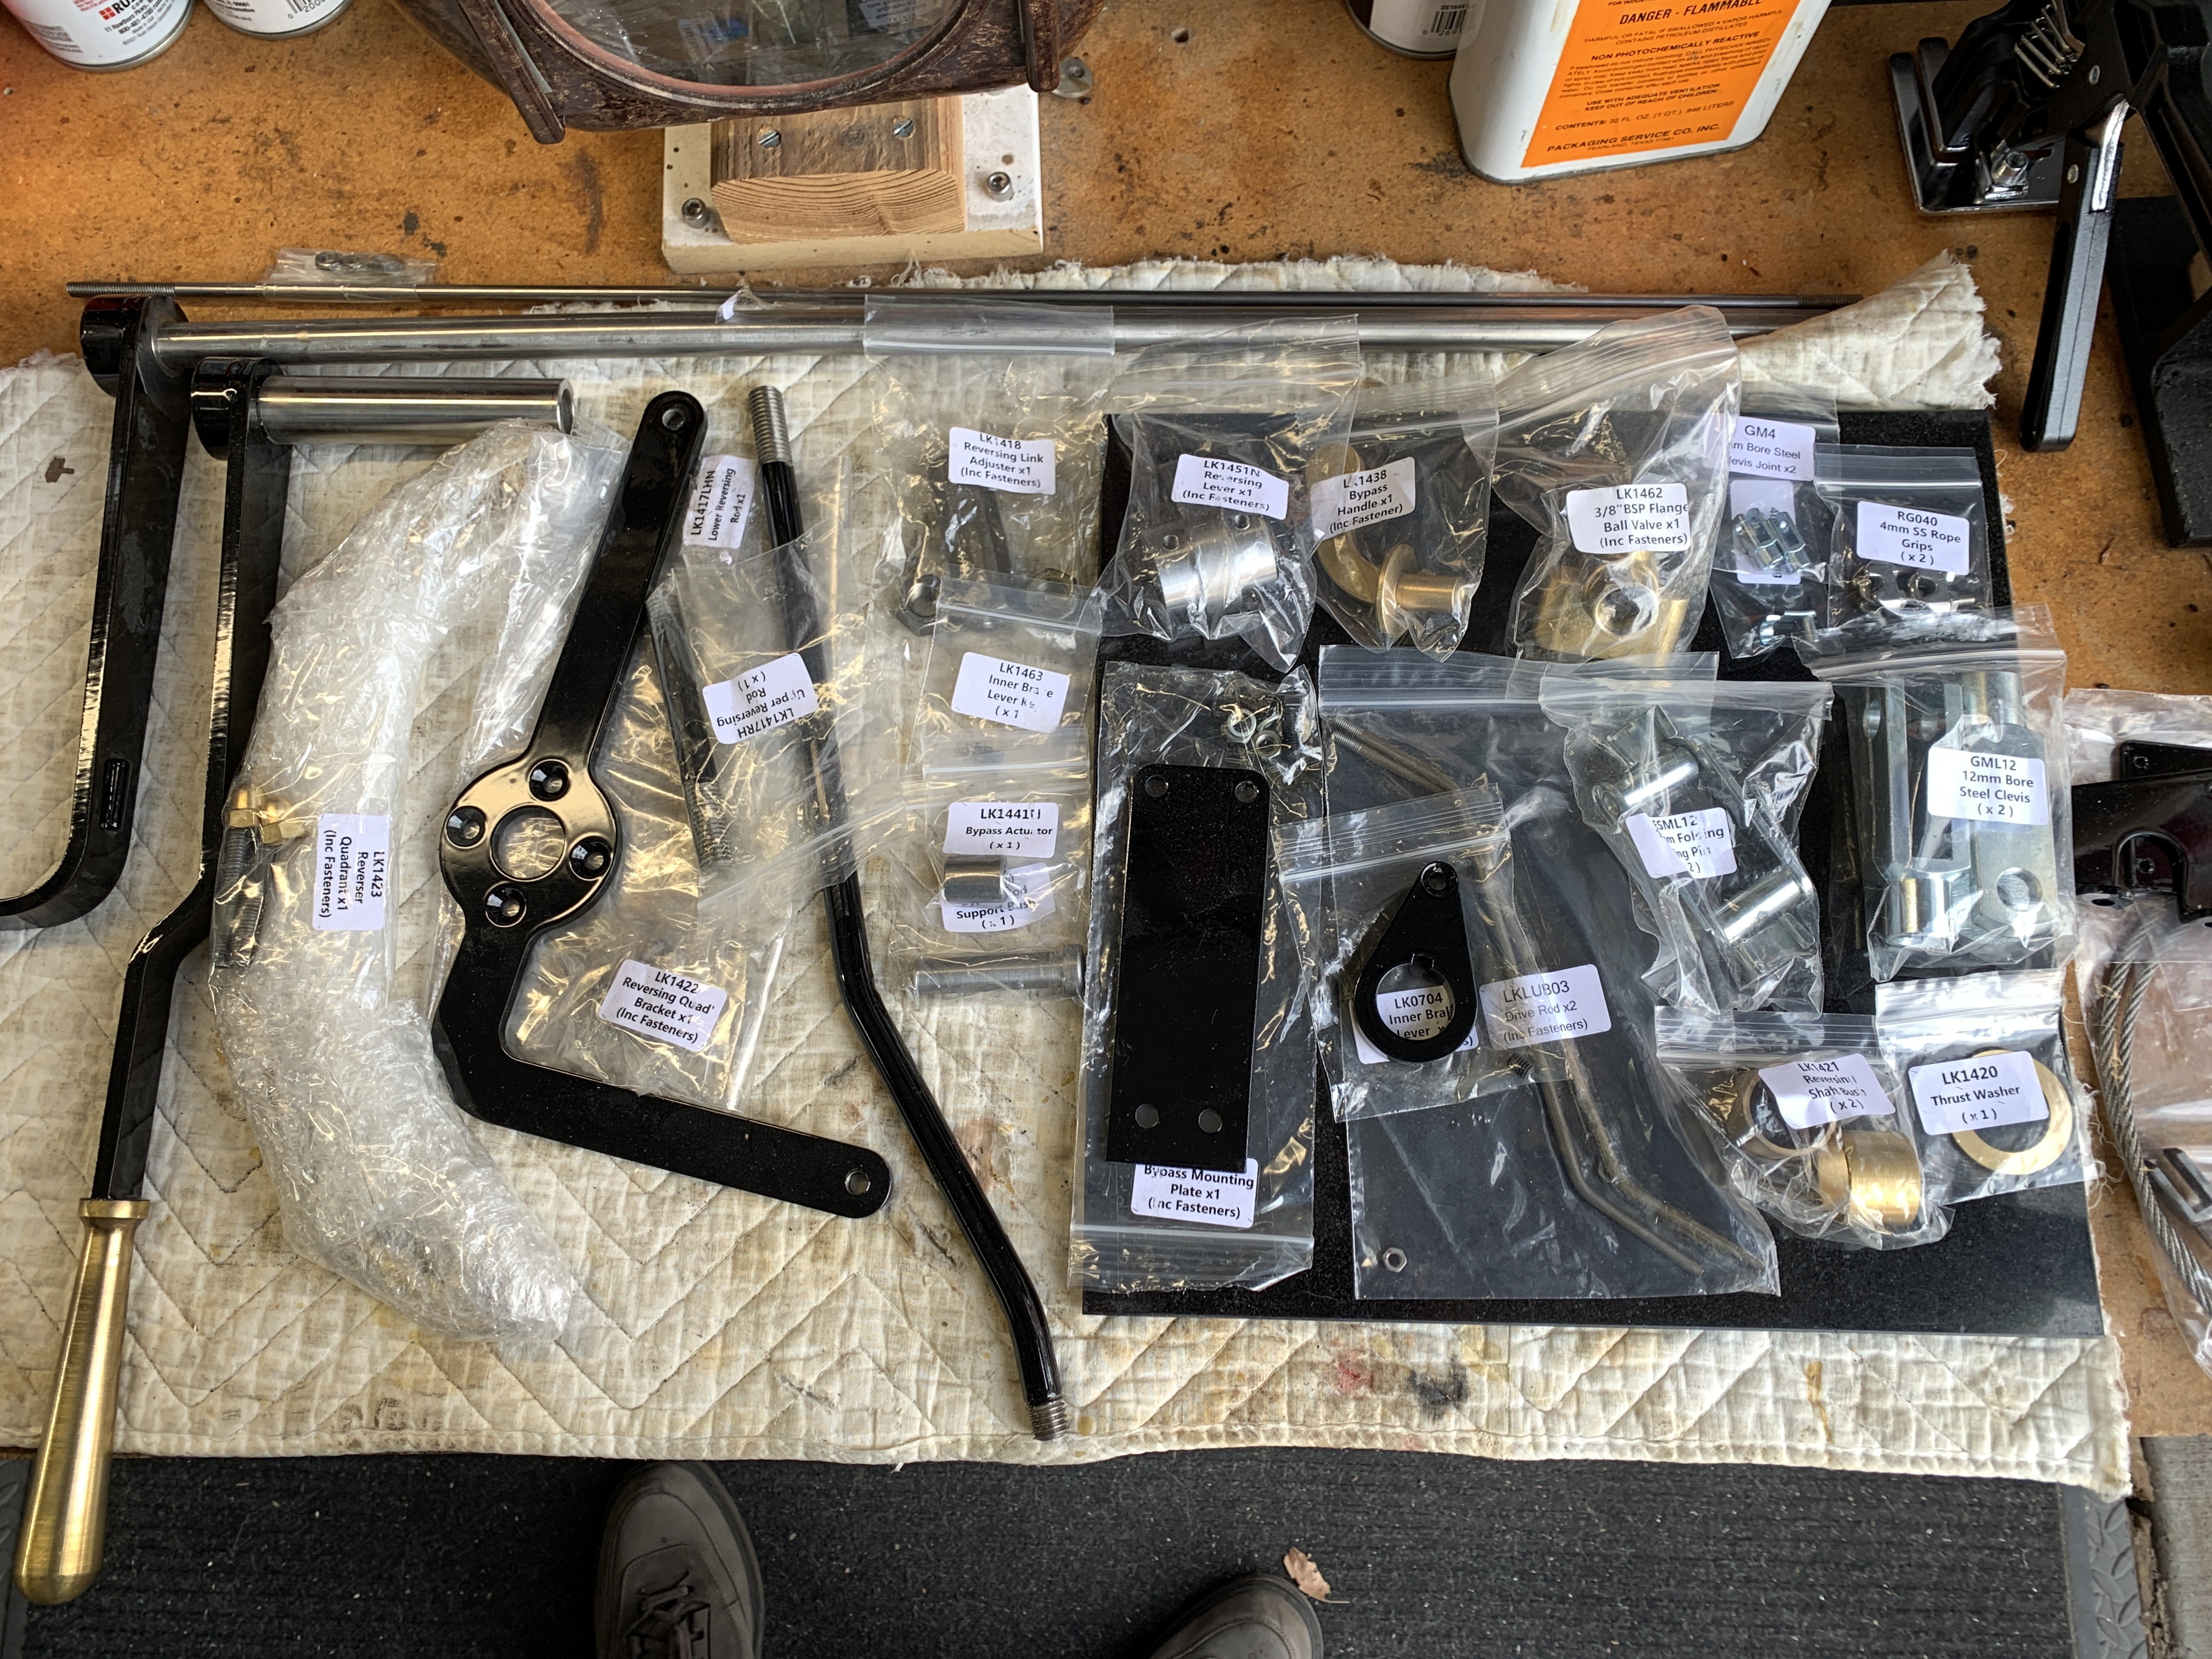
While I waited on the weather, I buffed and polished the brass "quadrant".

So now it is early in March, and we have a few days above 50 degrees. The engine is in place, the differential has been re-assembled, and parts are ready for assembly.

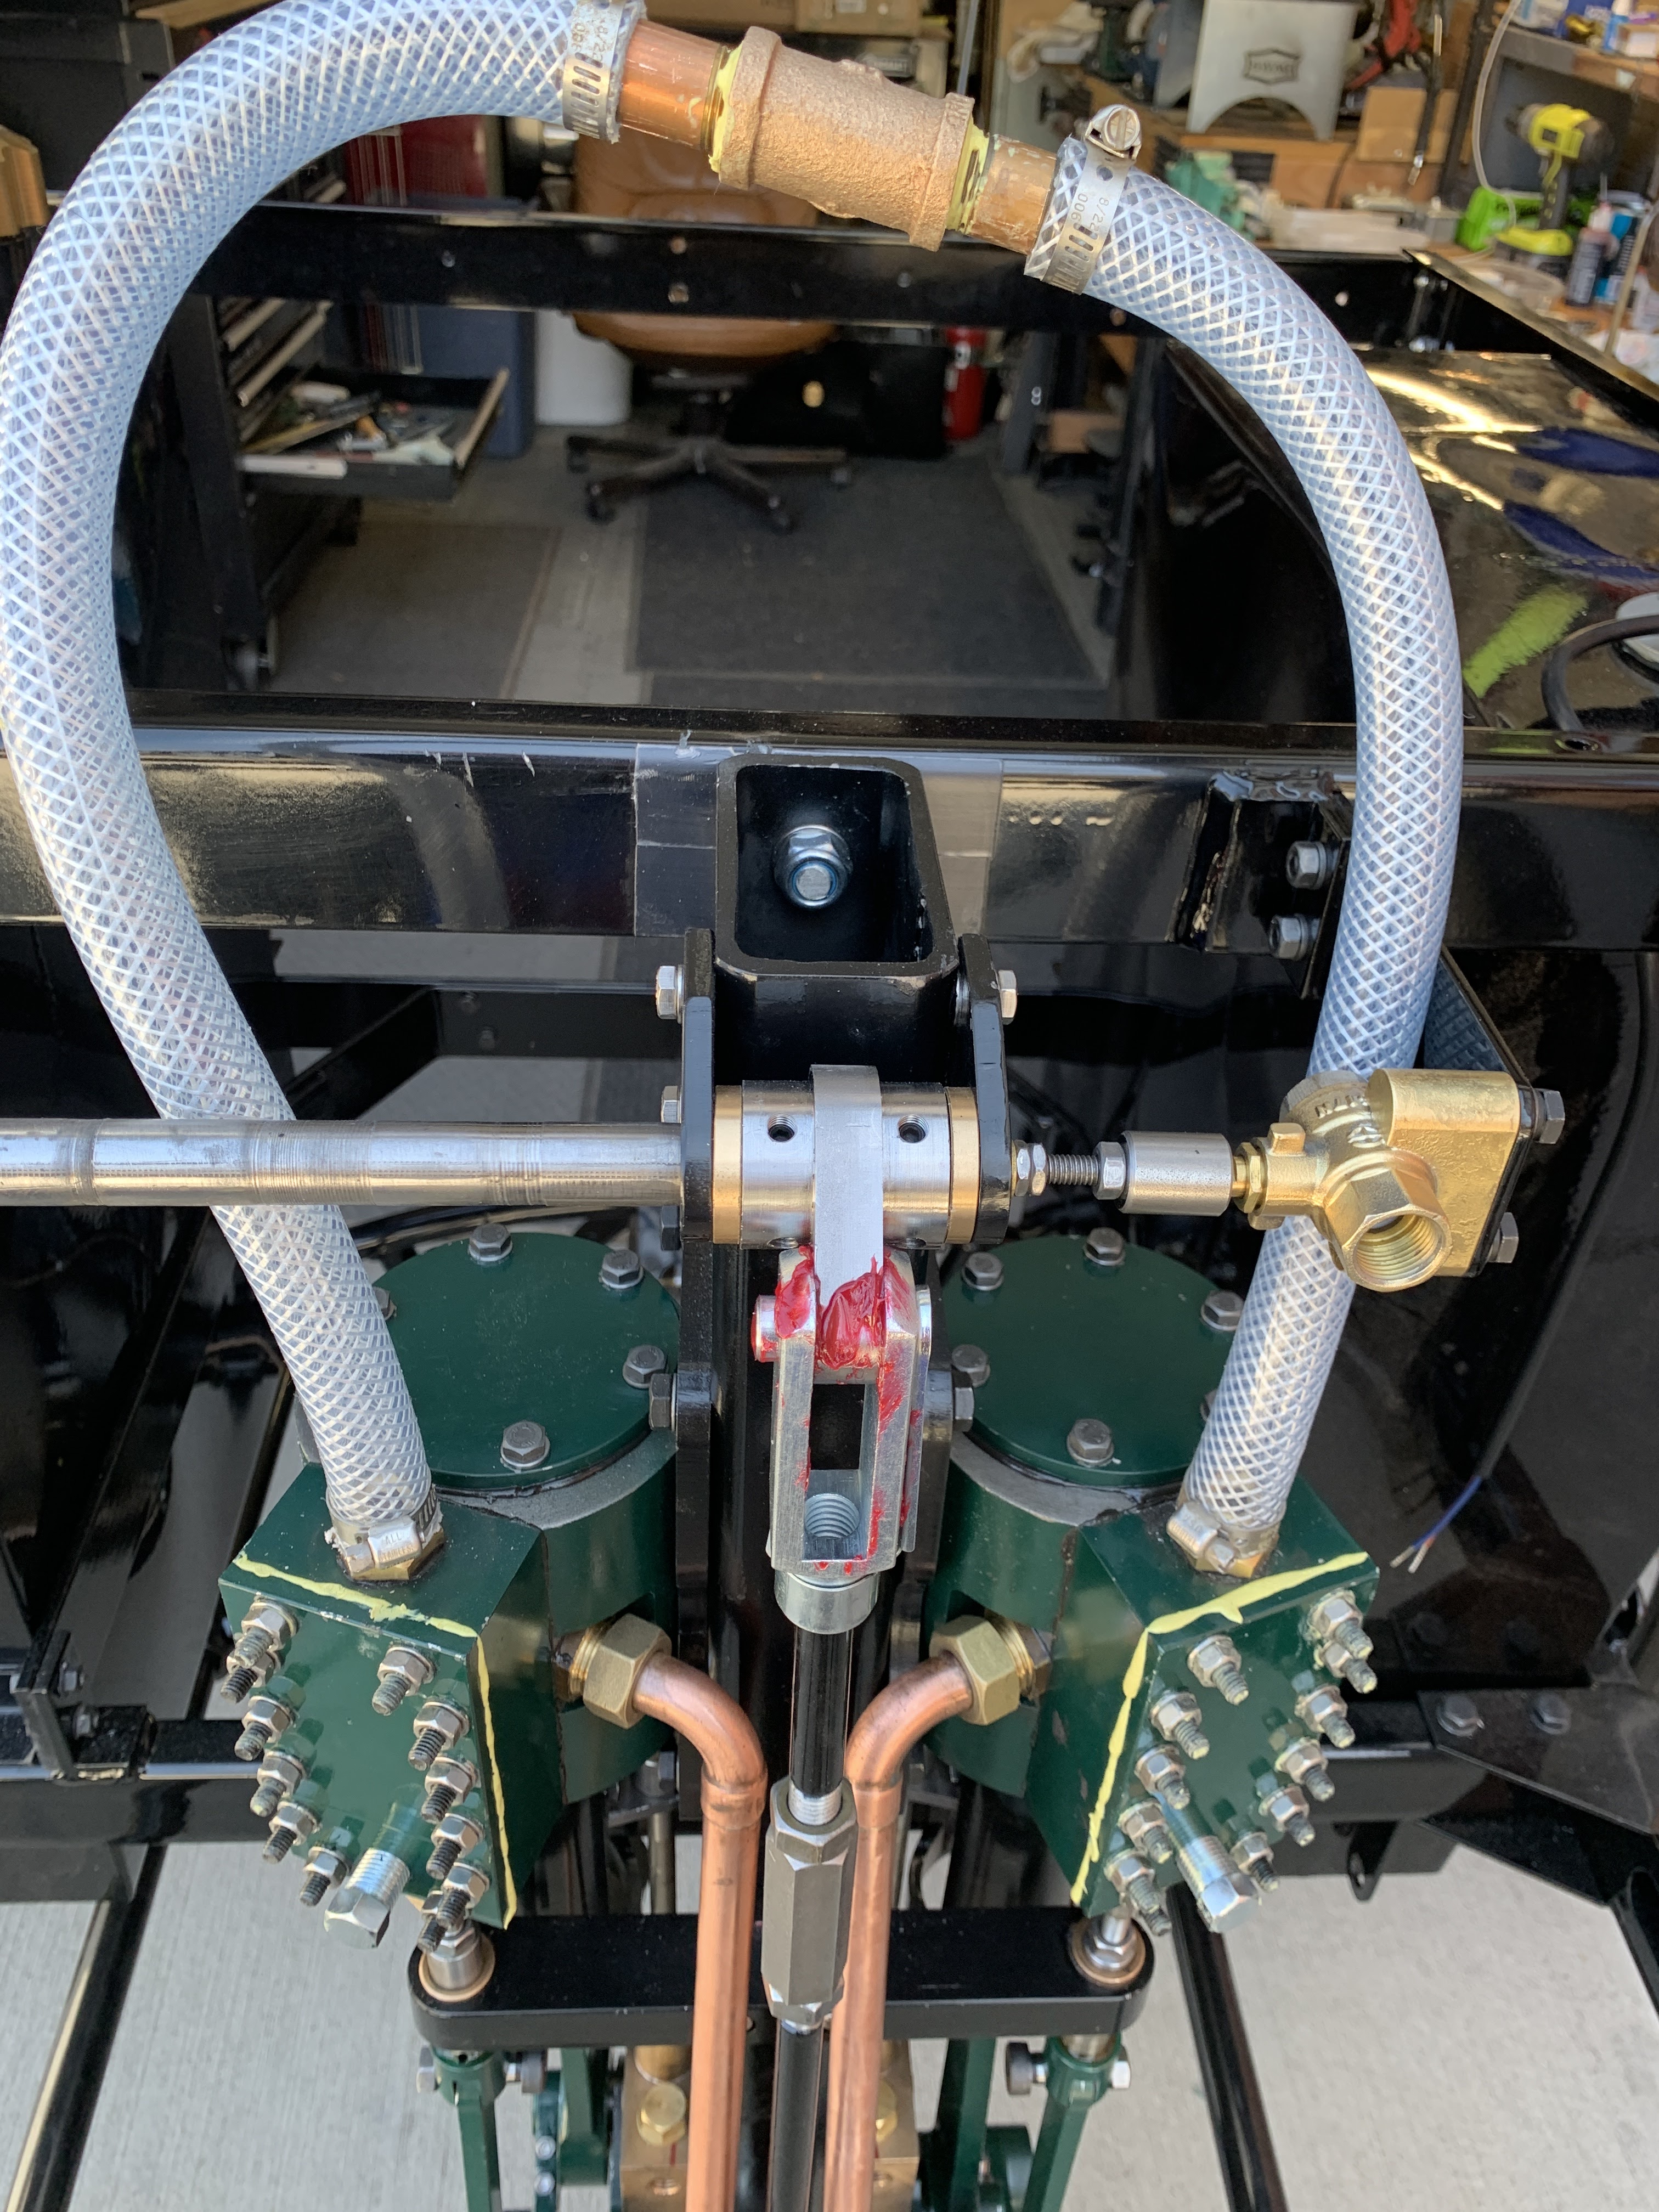
First was the supporting bracket.

Then the Brake Lever was installed. Followed by the "Reversing" Lever. The shafts fit inside each other and finish with the rod for the pump bypass.


The far end of the reversing shaft ends at a pair of bushings in brackets with the upper end of the reversing rod. It took a few shims/washers on the brackets where they attach to the main engine tube to make things line up. I also needed to clean up the interior of the revering shaft to make the interior bushing fit.


Then the Pump Bypass Valve is mounted on it's bracket and the control rod inserted. The overall length is about 1/4 inch too long. So a little grinding and adjusting the angles makes everything line up.


Then the lower control clevis for the reversing arm needs to be added to the shaft and connected. This required a partial disassembly of the linkage, luckily very easy at this point.


In preparation for the attempt to run on air, I found the plug I needed for the face plate on the slide valve chest. Turns out that piping in this part of the Lyka is BSPT (British Standard Pipe Tapered). I have found that McMasterCarr carries all sorts of goodies and I am confident that going forward I will be able to adapt and tweak te piping system. But for now I will just leave things alone.
Timing The Engine
Now that I have the reversing linkage in place, I need to setup the timing on the engine. I took the covers off the valve chests and exposed the valve slides. I made sure that the slide would still "float" meaning move horizontally against the face of the valve openings, but also would NOT move vertically between the nuts on the valve rods.


The "Timing" process is not difficult, but can be tedious. You bring the piston to TDC and adjust the slide rod so you just see the opening behind the slide. Then you move the piston to BDC and check the lower opening. The trick is to average the opening size between the two positions. After setting both pistons in the same way, you have to move the reversing linkage to the other position (reverse) and check again. Then go back to the first (forward) and verify you did not mess anything up.
After doing this, I used SteamSeal and attached the tops of the cylinders, adding washers. I should not need to open those again.

I used RectorSeal 5 on the face plates as I may need to go back in to those. It works well and stays semi-soft. I will replace it with SteamSeal a little later.
Next I put together a manifold from some pipe nipples, a pipe "T", and a compressor fitting all together with a couple of pieces of reinforced flexible tubing. I used some ring-clamps to keep anything from popping off under pressure.
Running on Air
I have a small compressor with a tank that is about 2-3 gal. - I use it with nail guns for carpentry and such. It does not really have the capacity to be used with "air tools" like grinders and such.
Those facts aside, I used it to power the engine for the first time. The first time, I drove the engine at about 60 PSI. The engine gave a little "squeak" and started right up. I could only get about 30 seconds out of the system before the pressure dropped. So I worked up a process of running the engine at 25PSI for a longer period on later runs.
FIRST RUN -
60PSI. When I reversed, you can see the linkage stop because the full pressure caused it to lock up. It real life, I think that the driver would let off on the pressure before shifting.
I made 6 runs today, and varied the pressure to see how things acted.
I noticed some minor "clicking" - not sure it is a full "knock" but I will spend some time looking for the sources.
More views and runs - all at about 25-30 PSI. I am surprised how smoothly it all is going.
Finishing up -
I know that running on air is much different from running on steam. My experience with smaller engines is that Steam will run much smoother.
So -I will make a few more short air runs and and look to see if there are any real knocks or interferences to worry about.
Thanks for reading -
2 comments:
Well done Jim I’ve not tried running mine on air.
After trying the seat I had to bend both the park brake and reversing levers outwards to clear the side of the seat and give clearance for my fingers! Fortunately did not damage the paint too much doing so.
I have now run the engine about 10 times on air. It turns over at about 15 PSI. I spent a bit of time looking for the source of the minor "knocks" - More details to follow. I see what you mean about the brake lever angles. I hope to get my seat early next month, so I will pay close attention to that. Thanks for the comments. Poppapope
Post a Comment
Thank you for posting your thoughts on my build.