What its all about

Poppapope's Steam Car

Kit 6 - Disc Brake Caliper Alignment

 Disc Brakes - The Caliper Mounting 

STW provides 4 Disc Calipers.  Each has a fitting that is dual purpose, Banjo and Bleed. They tell you to put these in the upper hole, the lower hole is plugged with a grub screw that seats against a steel ball. 

When I spoke with Grier, he told me that his calipers came in a similar manner, but his dual fitting was in the lower hole.  

To make things more interesting, his instructions said that an additional bleed fitting would be coming, but never did. My instructions do not mention the additional fitting. 

Minor confusion, and a question or two about hydraulic-dynamics.  The brake fluid only has one way in, and you would need to loosen the grub screw to get all the air out.  That would make a mess.  Grier told me just that, and further said that he was still dealing with "mushy brakes".  

So I decided to do a few things on this.  And I may be wrong, but here goes:

1.  I put the "input fitting" that carries the fluid, on the lower ports. 

2. I purchased (4) 10MM x 1 Brake Bleed Screws from our good friends at Amazon. 

3. I purchased 2 bottles of DOT 5 Brake fluid.  Since the system was empty and I wanted to avoid the chemical issues with DOT 3, 4, 5.1 fluid, I went for 5. 

4. I got DIY one-man brake bleed kit.  

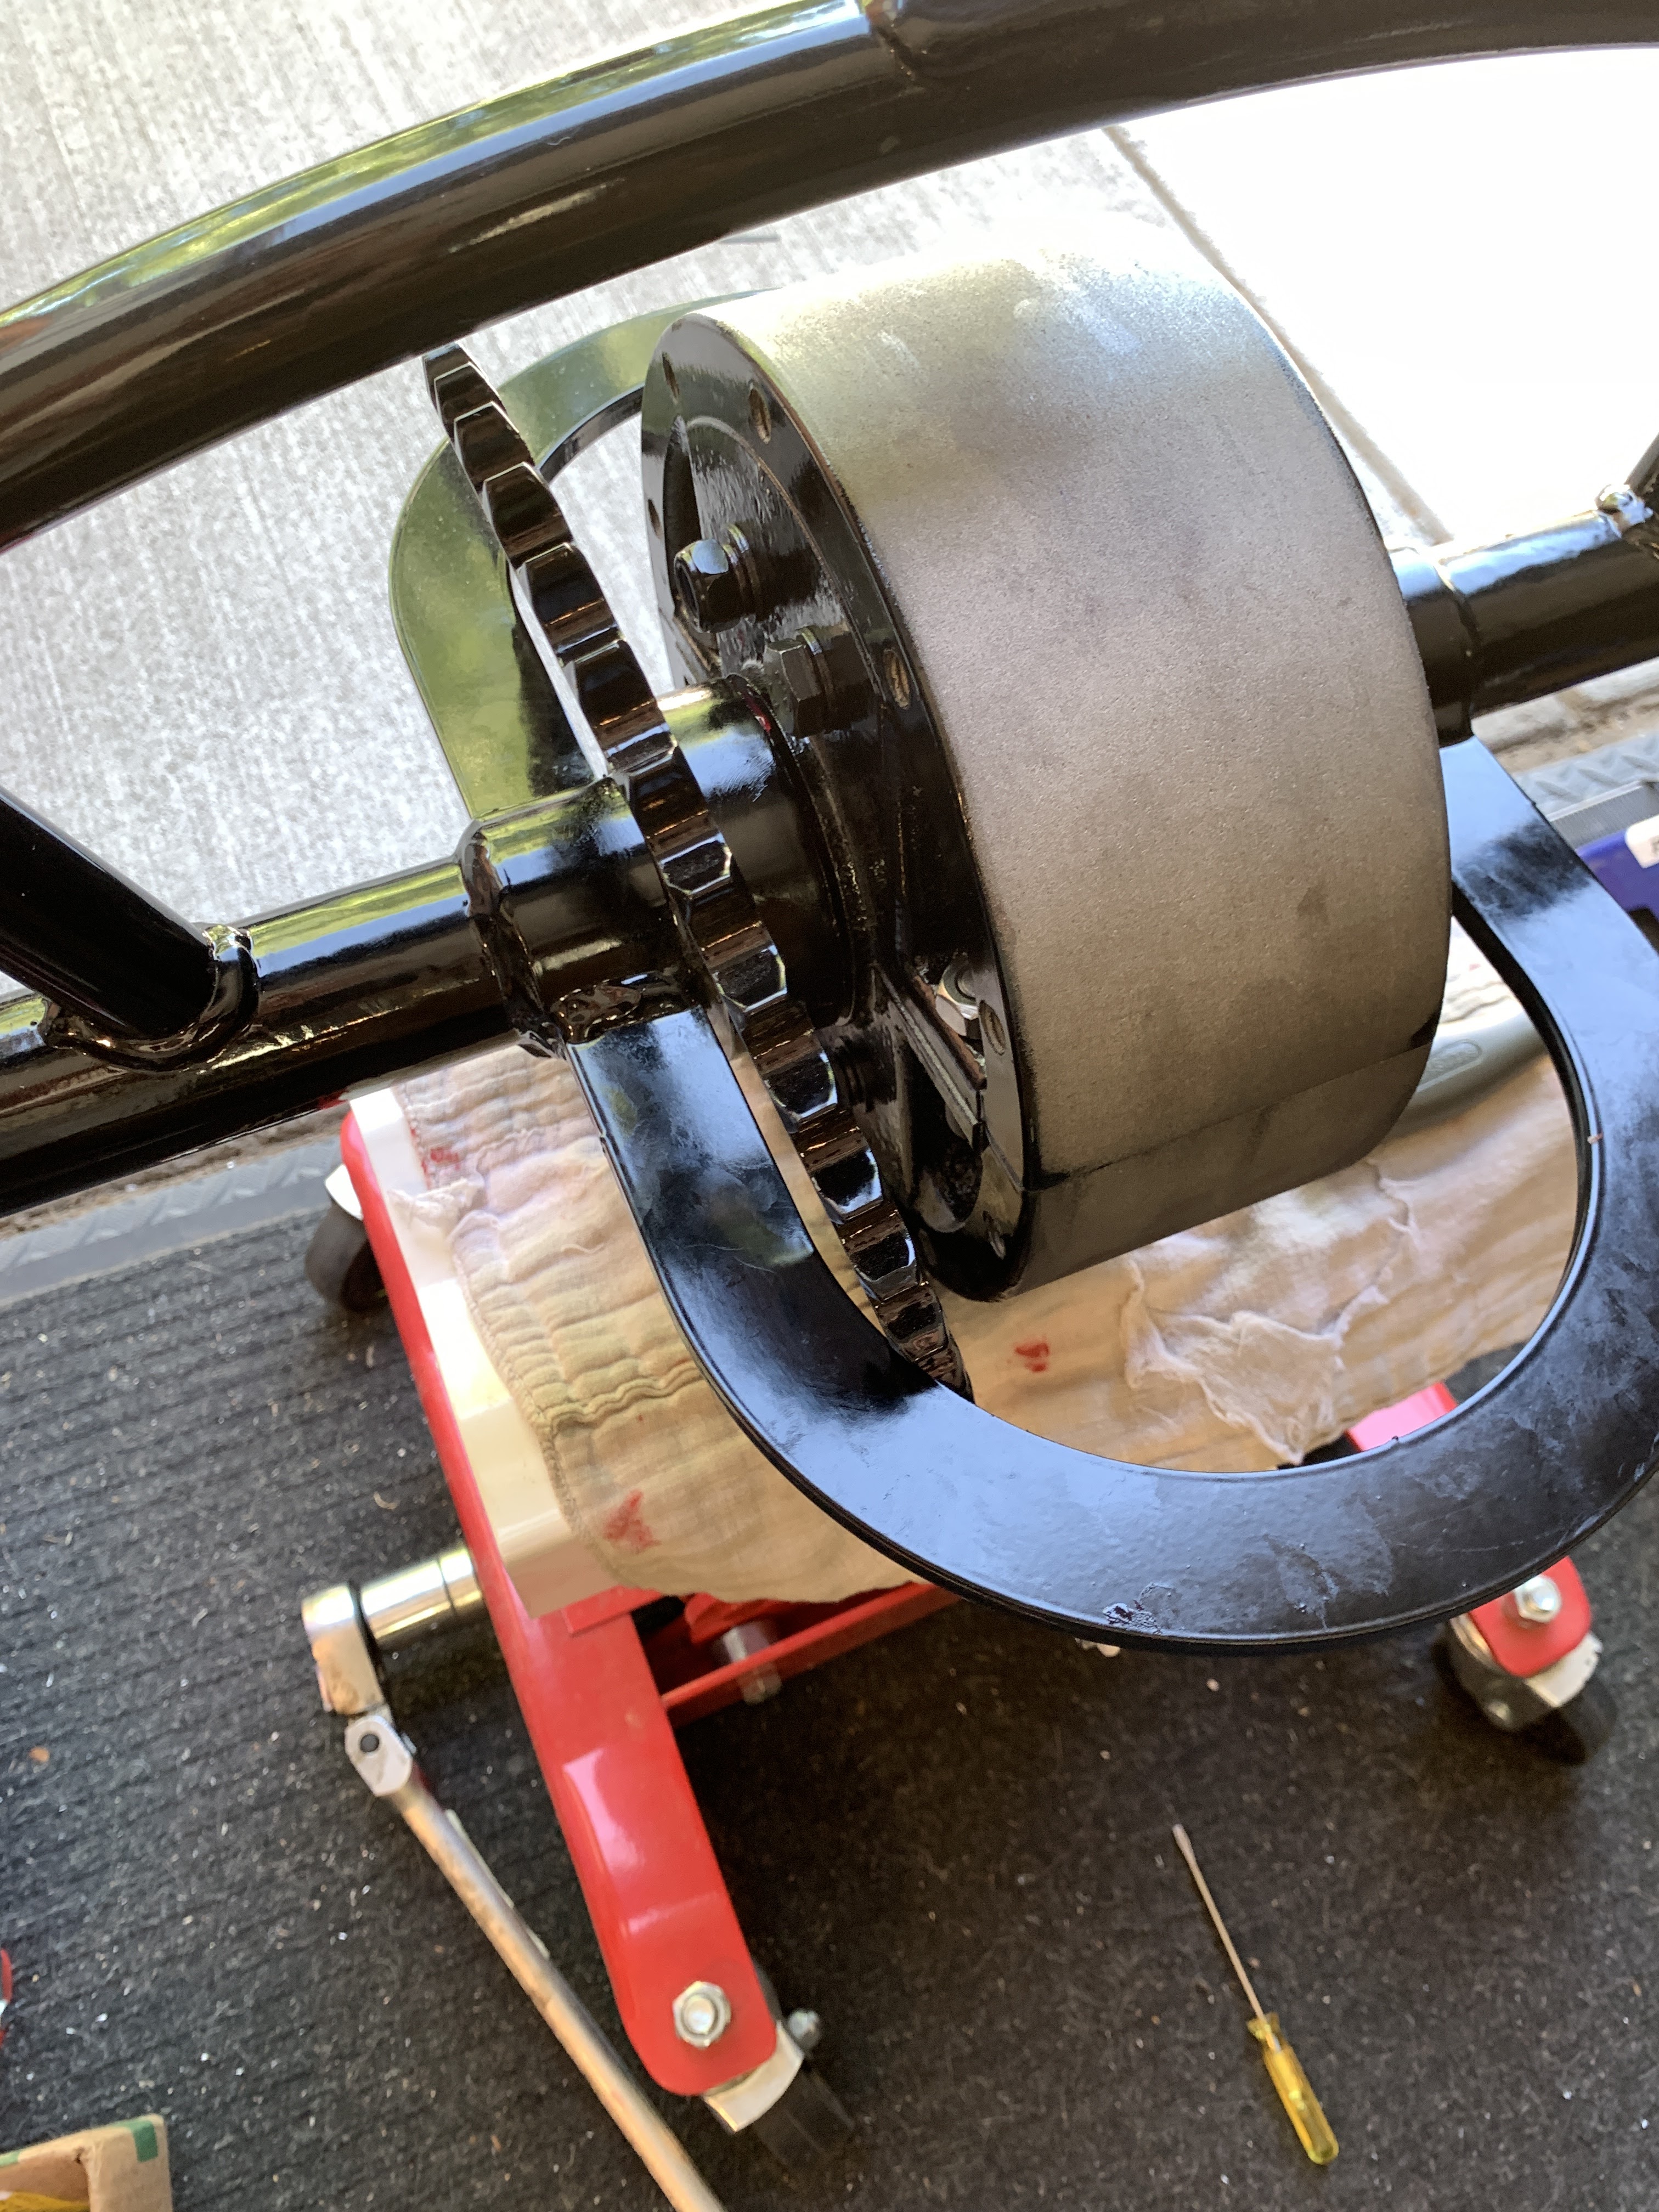
Now, when I mounted the calipers, I noticed that the front ones were 1 or 2mm off center.  I went back and cleaned off the little mounting protrusions on the mounts, removing all powder coating.  Still off a little, rubbing on one side. 

I purchased some 1mm thrust washers from McMaster-Carr, another favorite place, and used them to shim out the wheel assembly.  Both wheels turn easily. 


Before cleaning things up, slight tilt on the caliper.  The inlet fitting is still on the top hole.


 After cleaning the coating off the mounting nubs and adding a shim, we have a happy wheel.


The actual piping will take place after the frame is assembled. 

Here is the caliper and ports in final configuration: 


Stand by for the next posting.

Thanks for reading,

Poppapope
Denver, CO USA


Kit 6 - Leaf Springs and Parking Brake

Assembling the Leaf Springs

I got the spring sets back from the powder coater.  Very nice looking.  Each set is made up of a "base pair" plus 4 leafs, top and bottom.  STW had pre-assembled the sets and after taking them apart, I got down to the base pair.  I decided to NOT separate those, as the bolts and bushings were "very happy where they are."  The folks at the powder coater were very careful and did a great job on them, giving me a really nice starting place. 


 When I got the first set together, and did a trial fit to the chassis, I noticed that the first (smallest) leaf was a little too wide for the mount.  I chose to grind down the leaf rather than the mount. So I took about 1/8" off one side until there was an easy fit in the slot. I kept one side un-touched to provide a way of perfecting the alignment with the chassis. 


So you can see above that I added some Dome Nuts to the leafs - First as a cosmetic and then since I did not like the extended look, I removed the first nut, ground down the bolt and kept the dome nut alone (with washer).  

Then I had an extended discussion with Grier, make sure you see his blog, and we discussed the clearance issues he found between the leaf springs and the water tanks on his car. 

This resulted in some modifications - 

1. Rotate the springs so the flat head of the main bolts face outwards. On his Lyka he had the bolts inward, and they scraped the tanks on heavy bumps.  

2. While the lower leafs had the U-Bolts as shackles to keep the leafs from spreading, I fabricated brass bands for the top leafs to accomplish this.  They may turn out to be too light weight, but time will tell. 


Parking Brake

The Parking Brake is a band that clamps around the differential.  You need to glue/attach the band material to the inside of the metal band, then secure the assembly around the differential on the chassis.  

The band ready for adhesive.


I used construction adhesive and then every strong clamp I had. 


Let it set for 48 hours,  then tried to fit it around the differential.


It took a fair number of grunts and groans, but here it is in place, with a temporary bolt to keep it from "un-springing." 

The actual linkage for use will go in later in the build. 

The Calipers are next,  

Thanks for reading,

Poppapope
Denver, CO USA


Stuff I bought to help finish the build.

 Assembly Aids and Supplies

These are items I bought to help me put my touch on the build process.  STW does give you "everything" you need, but I found that I wanted to take things a bit farther.  

Washers - STW provides very few washers.  I was raised to think; "If it is going to flex, expand, contract, or shift - think about putting a washer on it."  They also act to protect the surface from scratches and having the head/nut embed in the powder coating.  So - I bought a selection of both Stainless 304 and Black Oxide Washers, Nuts, and also assorted Bolts.


Thread Locker - STW provides bearing adhesive and another bottle, both are clear and unfamiliar to me. Most of us know Loctite - 242 as a medium strength,  I discovered that there is now a 243 that works well with remnants of grease or oil on the parts.  So a bottle of that is on my bench.  262 is the RED stuff and may also be used.  Finally a little "Ultra-Slick" for when I assemble the engine, it provides extra-slippery protection during the period that I am working with the engine prior to steaming.


UHMW Polymer Tape - Since I had the Leaf Springs powder coated, I felt that there was a good chance that the leafs would scratch each other during motion and sliding.  So I got a roll of this to aid in protection and hopefully also keep things sliding.  


U-Bolts - I read that the Leaf Springs had a tendency to spread sideways so adding u-bolts should keep things aligned. 


Form-A-Gasket - A tube of this is always handy when assembling things that might leak fluids.


Brass - Metal Polish - Cause you need to keep stuff shiny. 


Accessories - Cool Stuff I might add to the car. 

Speedometer - I see in other blogs where the builder has modified the brake disc by adding gear teeth along with mechanical cabling and an antique Speedo.  I chose a different route - I bought a GPS Speedo for a scooter (top speed 35MPH). 


Electrical Distribution -  Since I am adding some number of features to the build, I thought a distribution and fuse box might be in order.  


Lights - I picked up (privately from Dean at STW) a pair of Lucas - King of the Road Lamps.  These will be mounted on the sides - once I get the mounts from somewhere.   They are oil lamps, I have changed them to LED but kept the oil burners to convert back if I want to. 


Horn - and or Whistle -  One of each, or both, I will figure it out later when things get farther along.  The whistle appears to be a "home brew" model, but sounds really nice when you blow thru it.  The horn is from Rubes, and is well loved and complete.  So either way, people will know I am coming. 


And Finally - 

A Brake Light, and Switch - Cause I bet I will need one to get a License Plate.  Oh, and a Plate Bracket to go along with. 


So - that is about it on the "extras" - Mostly to make a cool car even cooler. 

Back to the build, 

Next are the Leaf Springs and final adjustments on the brake calipers. 


Thanks for reading - 

Poppapope
Denver, CO USA


Differential and Rear Wheels/Brakes Kits 3 & 4

Kit 3 - The Differential

I read the instructions for this one about a dozen times along with the description in Grier's Blog. I was a little intimidated by the prospect, but in reality it was not so bad.  I had sent the differential casing out to the powder coater and they did an excellent job with just the rough sections on the outside.  Everything was nicely sandblasted and cleaned up.  

I started with the smaller gears, inserting the bushings, fitted the arbors, and checked how each would go into the casings. 


After the initial fooling around with the smaller gears, I unwrapped the axles and started to look at the pieces that would fit on them.  It is lucky I did, most of the pieces would not slide onto the axle to the place where they belonged.  This sparked a flurry of activity organizing the bearings, bushings, Drive adapters, etc.  Each was tested in any of the possible locations, and the best combinations identified. Then I proceeded to go thru a boatload of emery paper (off a roll). spent about 4 hours buffing back and forth until the pieces slid on.  In most cases the piece would slide on and then stick about 1/4inch from the end. 


Nothing a lot of "elbow grease" wouldn't take care of.  I did the bearings and then both of the drive adapters that are part of Kit 4.  I also needed to fit the various keys in the shafts and keyways, cleaning up the broach marks and easing the slide fit a bit in each. 

In the end, I had to remind myself that the whole thing needed to be able to be maintained.  That meant taken apart and put back together.  So not having the fit correct at the beginning would cause a major amount of pain in my backside if I had put things together and then had to work on an axle. 


Once I made sure all the parts would slide to where they belonged, I worked on the large spur gears. 

These fit nicely on the end of the axle,  and with the bushes and arbors fit very nicely into the case.  I could rotate the case and the wheels followed suit.   The nuts on the axle ends were pretty tricky to put on,  but I used a very thin pair of vice-grips and a small screw driver as a wedge.   

However, in the final assembly, there is a spring/lockwasher under each nut making things just a little more tricky.  


The process requires you to have a comfortable place to sit while you calmly pinch your fingers trying to get the nut to start.  Eventually you get it and it tightens up very nicely.   


Only to reach over and grab the drive gear.   Then realize that there is something wrong with "This Picture": 

Well, I did say you have to be able to take it apart for maintenance, so practice makes perfect. 

The RED bolt is the "oiler - hole" that goes all the way into the case to allow for you to squirt in more grease or heavy oil. 

Kit 4 - The Rear Wheels 

Since I had taken the time to slide fit all the components,  putting the wheels on was easy.  just greased everything up and slid it all together.  

It actually went so fast that I forgot to take a bunch of pictures.  Just one showing how I marked the keys once I got them in the "right" slots and ready to go. 


So that it for the wheels and drive system.  Next is the leaf springs and brake calipers.  The chassis is now able to be wheeled in and out of the garage easily.  The jack stands were nice but a pain when you were working solo.  

Thanks for reading.

Poppapope
Denver, CO USA