What its all about

Poppapope's Steam Car

Kit 1 - Chassis Assembly

Here we go.   

The Chassis Frame

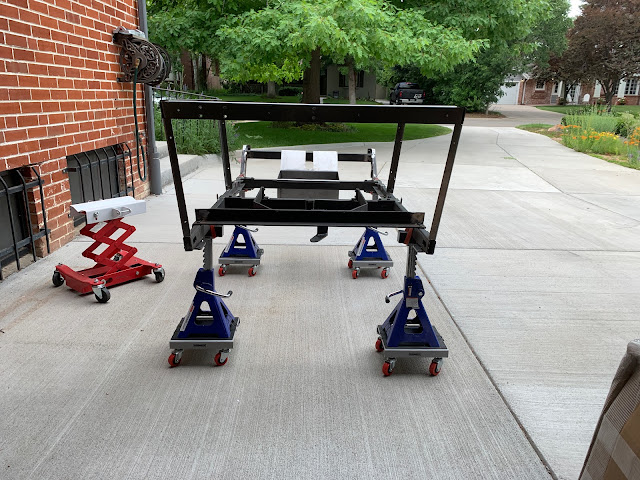
Brought out the jack stands - now on small wheeled platforms.   I have added the soft rubber tops to keep from marring the finish.  I used large rubber bands from a "long ago" exercise regimen to hold things in place. 

Use the stands to hold the front and rear axles.  Added the tubes between them, and then the shorter members.  It all gets tightened up by using "clamping plates" - you have to watch out to avoid the wrong plate on the wrong tube, but everything matched up and came together. 

As one of my predecessors, Grier (see his blog), commented, STW leaves out the washers on most of their bolts, studs, etc.  I will be adding these as we go along.  I agree with most that using washers helps keep things from being marred when tightening it all up. 

I took a moment to run a bolt into each threaded hole to make sure it was clear for future use. 

Washers - and Black Oxide Nyloc Nuts. 
Getting all the studs in the correct holes first, then going around and finishing it up.  The instructions talk about "flexibility" and not worrying about "square and level" - but I was always taught to build a firm foundation in order to keep things in line moving forward. So I danced around the frame bringing everything tight in alternating locations, like you would do with a tire. 

Steering

I ran into the first (of many to come) "Gee - I wonder what the measurement should be" - minor dilemmas when it came to the steering system.  

STW gives you "ISO" drawings,  where most all parts are called out. So far I have only found 1 missing. However being an engineer (albeit Electrical) I am mildly aggravated by a lack of dimensions.  For example - how far below the brackets should the Steering Tube protrude? 

The Steering Shaft, goes thru the tube via Oilite Bushings and a short arm is attached to the shaft at the bottom.  This will drive the steering linkages (Next Kit) so it is of minor concern to put it a the right level in order to avoid having to come back at adjust later.  Especially since the clamping action will grab the finish and moving things will leave marks.  

The ISO drawing just gives a relative position, and shows the arm up close to the bracket.  So keeping STW's philosophy of "flexibility" in mind, I made a reasonable guess and locked things down.  

ATTITUDE CHECK -  This is a puzzle as well as a project.  The puzzle keeps it interesting, the project gives the final result and satisfaction is attained throughout the process.  (My mantra for this effort) 


So here is where I finished up, I needed to paint some smaller pieces before moving to the next kit. 

I think I will need to widen my work area a little once the wheels are on.  


More to come,

Thanks for visiting,

Poppapope
Denver, CO
USA

The First Batch Back - Parts of Kits 1,2, & 3.

 I went over to Colorado Powder Coating on Monday and dropped off the body frames for coating. 

At the same time I picked up the pieces from Kits 1, 2, & 3.  

This weekend I will start the assembly process in kit order.  


A few dollars well spent I think.  A lot of noxious fumes avoided, and a smooth beautiful finish as a starting point.  


More to come.


Poppapope


Actually Acomplishing Something - Frame Pre-Assembly

I got word yesterday that the powder coater, Colorado Powder Coating, had finished with the first two batches I sent them.  The Chassis, Steering, and Differential (Kits 1, 2 & 3)  and the Leaf Springs (Kit 6) all had parts that could be coated rather than painted by me.  Those were now ready for pick up.  The next pieces for coating are the Body Frame (Kit 8) and the Tanks (Kit 9).  

So, not being one to waste too much gas in these times, I only wanted to make one trip.  I knew that there would be some preparation required, so I started to work on the frame, using the jack stands to keep it off the ground.  

My previous post "A Penetrating Glimpse Into the Obvious" detailed the slight detour in life that took place. Here we will just focus on the actual assembly after the fog lifted and clarity resumed.

The Base Frame

I strapped the two side frames to the jack stands and started with the middle two cross members.  This is because the slant of the ends of the members will determine the "tilt" of the frame sides.  I had to drill a little bit of the bottom bracket of one of the sides that held the front-most mid beam in order to get the bolt in smoothly.  Once the two mid-beams were in, the front cross beam and the rear one, a piece of angle iron that just sat on top, fit very well (minor cleanup on the front) and everything tightened up.  


Top Frame

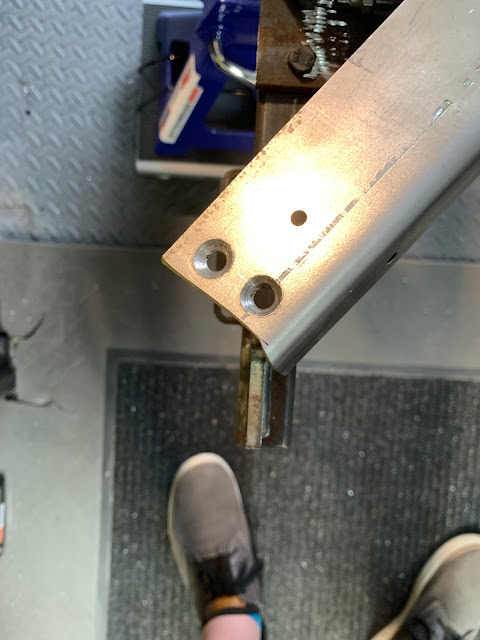
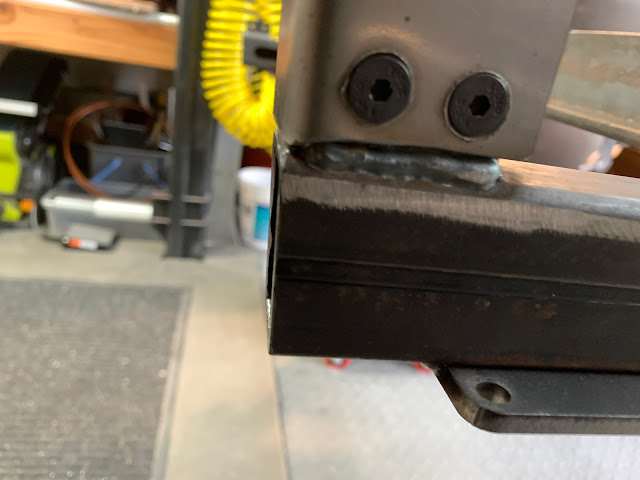
Once the base frame is completed, you need to build the top frame, linked by four vertical posts.  There is a very sturdy plate welded to the base frame at each location. Due the angles involved, it is important that each post sit "flat" against each plate.  The weld bead on the outside edge of each plate will interfere with this unless you grind away either a little of the bead, or  "notch" the end of the post to fit. I do not like to remove nicely done welds, so I chose to notch the end of the posts.  Used an Angle Grinder - my new favorite tool, and flap disc, working on each post until everything was stable.  Some of the holes in the plates needed to be countersunk a little to accommodate the fact that the flat head bolts protruded thru the posts about 1mm and needed a little relieving.  Following the hint in the notes, I left each post a little loose to allow for flexibility in the attachment of the upper level. 


The top frame attaches to the four posts in an interesting series of interlocking flaps and tabs resulting in a nicely presented structural assembly.  That is - once you figure out that the two small plates they give you are needed to attach the front pillars to the end of the side frames. With everything attached but slightly loose, you square-off the front posts with the base frame, and tighten everything up. 

The final touches on the frame is the additional two heavy iron brackets in the rear (boiler supports). 

The Battery Box

The Battery Box fits between the two front cross beams.  It is made of heavy gauge steel, and just hooks over the beams.  However, a little adjustment to the bend angles is needed to get things to lay flat.


This was a test fit - once the battery box dropped into place, the "Pedal Plinth" also squared up nicely.

Here we see the "One-Footed Angle Adjuster" in action.

Once the "Angle of the Dangle" was corrected, everything dropped into place, including the Pedal Plinth (say that 10 times fast) that gets bolted between the side frame and the Battery Box.  The batteries I will be using were tested to confirm the fit, and all is well. 


Now - I just needed to take it all apart and get it to the Powder Coater tomorrow.  I will have the original batches from them and can get started in the correct order. 

NEXT - Kit 1 -  Fully Painted Assembly. 

Thanks for reading. 

Poppapope
Denver, Co
USA

A Penetrating Glimpse into the Obvious

Everyone has "One Of Those Days" every once in a while.   I had one yesterday.  It started normal enough when I decided to lay out the body frame and do any adjustments needed prior to taking everything to the powder coater.  

I laid everything out, cracked out the instructions, and arranged the main frames on the jack stands and began fitting things together.  The instructions just say to assemble the lower frame first and then add the upper parts.  


So I started at the front of the frame and fit the first cross beam, then went to the back and added the member back there.  The problem occurred when I tried to add in the middle cross beams.  They did not fit!  The two beams are the same length, and yet measurements just seemed to be off.  I tried all sorts of combinations and then took a bunch of pictures and made a fool of myself in an email to Lynne at STW. 

I actually thought that production mistakes had been made, and I would need to cut and/or re-drill holes.  

Then I gave up and went to bed. 

After a night of pondering how all this could be occurring,  
I had an epiphany -  or  - A Penetrating Glimpse into the Obvious. 

There is no way in hell that STW would have screwed all this up. No How, No Way.  So I was missing something.  I had noticed that the ends of the middle beams were beveled, or slanted.  I had chalked this up to sloppy cutting, WRONG, it is because the frame sides are tilted.  This first came to light when I looked at the drawings, and there was an insert that discussed the future attachment of the sides, but also showed that the mounting plate for the leaf springs was at a slight tilt. 

It would have been nice if STW had called this out in their instructions, or at least told you to begin with the two middle beams, then the front followed with the rear member.  


 They are a little hard to see, but the protractor is reading 0 degrees, or plumb.  You can see the amount of tilt on the side frames. 


 It is kind of hard to see, but the ends of the middle beams pull the sides into the tilted configuration that then made the front "spread" apart.  This allowed the easy addition of the front beam. 

So - Another lesson learned:  TRUST THE DESIGNERS.  This is NOT a one-off.  This is NOT their first rodeo (Western US Euphemism).  If something is really off - you are missing a point somewhere.  Some mistakes may be made in the manufacturing process, but usually not something that requires any re-design on your part.  If you do not see it - walk away,  kiss your wife,  clean your tools,  come back to it.  

I know this may sound a little "preachy" but sitting back at my table on the patio the next morning, I was glad that this type of mental course correction came at the beginning of the build.   I can only imagine the amount of pain I would have caused myself if I had not taken a time-out. 

So - I sent another set of emails to STW, apologizing for being a dufus, and moved on to actually accomplishing something. 


ONE LAST THOUGHT - (at least for now). 

My internal nagging voice has been grumpy about the fact that the instructions from STW are a bit sparse in the fine details on the assembly.   I think that it is a fine line between too much and too little information.  I did not enter into this project looking for a "LEGOs for people with too much time and money on their hands."  Where every nut and bolt is meticulously annotated and drawn in a contrasting color so you can not miss it.  But, what I am finding is that there could be "just a little" more detail. Like "Start at the middle and work forward and backward."  Also I am seeing parts in my kits that are not annotated on the drawings or in the notes.  The placement is shown, but only clear after you figure out that the little line actually is the edge of the part.  

So I am taking the attitude that this is a PUZZLE.  You get the parts, you get a sketch, you get a little verbiage, and you have to use "what's between your ears" to put it all together.  

My lovely wife does word puzzles and Sudoku to exercise her brain,  this build will be my way of cleaning out the cobwebs.  


Thanks for reading, 
The real build starts in the next installment. 


Poppapope
Denver, CO 
USA

The Sound Track of this Build

 I listen to a lot of music.  Mostly to cancel out the "crickets" in my ears from Tinnitus. 
As such, I like to assemble a Playlist for each major activity, and switch it around as I 
go from my tasks to those assigned by my lady or while I am "working from home". 
 
So the Artists I have chosen for this build are:
Kenny Chesney
Jimmy Buffet  
Rag and Bone Man
Zac Brown Band
Crosby, Stills, Nash & Young  (in Various Combinations)
Mumford & Sons
Tom Petty
Dido
Fisherman's Friends
Of Monsters and Men
Gov't Mule
The Lumineers
Men At Work
Dropkick Murphys
Lyle Lovett
 
I usually pick a compilation album from each artist and just put it on "shuffle" -  

The volume level varies with the activity.  It usually gets loudest when the shop is closed up, 
and mellows out if I open the doors.  Or I pull out the headset and ignore the world. 

SO -  I encourage everyone to try some of these out, especially if you have not heard of them. 

Back to the Beginning of the Build . . .


Starting to look at pieces and parts.

PAINT and PREP 

After mocking up the chassis,  The parts were broken apart and sent to the powder coater.  I had a number of options for finishing the chassis and of course all the other metal parts.  

I considered painting myself, pun intended, and also using powder coating.   

Painting it all myself would entail prepping, sanding, priming, painting multiple coats, and a top coat. It would also mean a lot of fumes and as an "old guy" I need to be careful about inhaling chemicals.  OK - everyone should be careful about inhaling chemicals, but my lungs are already coated with about 60 years of paint and varnish from a long time in the workshop, so any additional is really bad.

Powder Coating means dropping it off at the local company, in this case the very nice folks at "Colorado Powder Coating, in Commerce City, and they sandblast, mask, and apply the coating.  It just takes 2 weeks for each batch. 

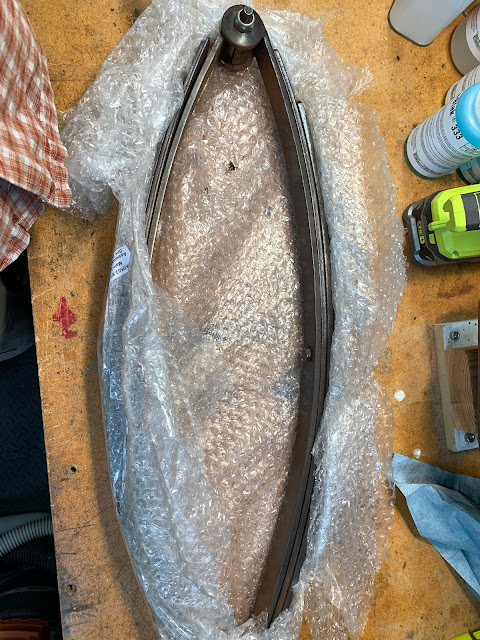
I then looked at the Leaf Springs, and boy are they "crusty"!  They came to me all assembled.  I separated the leafs but left the main ones attached as they are at the ends with bolts thru the bushings.  It looked like it was going to be a pain in the behind to break apart and get back together, so I am going to leave them as-is for the powder coater to work with.  I know that the coating on the ends may suffer a little, but taking them apart and putting them back again would turn out to be a major exercise in frustration. 


Next to go for coating will be the main frame. I plan to stage the coating batches one-a-week to spread things out.  So it will be around June 26th before I get the chassis back and the work really begins. 

Thanks for reading - 

Poppapope


I Got Lots of Boxes!!!

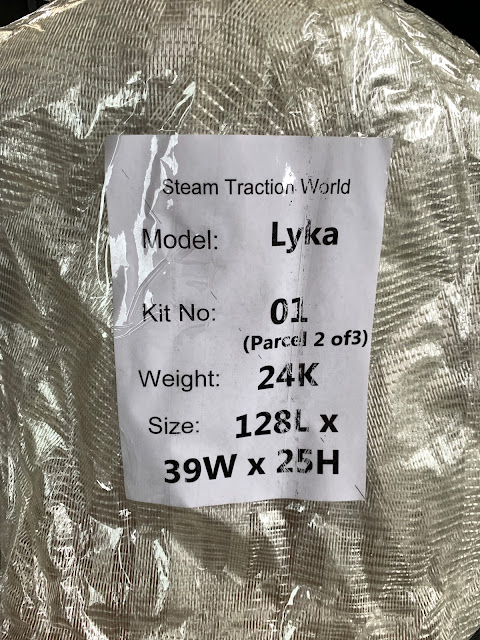
 Kits 1-13 - Arrive in my garage.  

Quality Control Inspection
(nothing to eat here so she lost interest)

So - here we go.  No more excuses, time to put my skills to the test.  

The transit time for my shipment was about two weeks from the time it left STW until it arrived at my door.  During that time, I learned a few things about international freight forwarding, most importantly, YOU HAVE TO TRUST THE PROCESS.  

In this time of Amazon - Same day delivery, and USPS daily updates on shipments in the mail,  I have gotten used to clicking on a link and seeing where my package is.  Well, you can not really do that in the world of international shipping.  

MY SAGA

I got word from Rosalie at STW that my shipment had been picked up.  Two days later I badgered the Freight Forwarder into telling me the expected flight date and Airlines/Flight Number.   I hopped on the airlines website and only found part of my flights.  The first one from the UK to USA (Dallas) was listed. The second flight from Dallas to Denver was not found.  Since I was picturing in my head my pallet sitting in a warehouse in Dallas for the next millennium,  I made a fool of myself and emailed the freight forwarder that there must have been a mistake.  Well, DUH, I should have called the airlines, turns out the second "flight" was a TRUCK.  Then I discovered that the Freight Forwarder in the UK turns the shipment over to another company that actually imports it into the US.  They contact you when the shipment lands, and ask who your Customs Broker is.  "What's a Customs Broker?" -  They are responsible for talking US Customs and Border Protection into letting your shipment pass and stay in the US.  Again - I had no clue, and asked the nice lady from the importer to recommend a Broker (she did and provided the paperwork).  I never actually heard from the broker, I have not heard anything about paying them for their services, and since no one asked for any more money, I can only assume that there were no import duties on the shipment.  Since the shipment was listed as "Model Steam Engine Parts" it appears that the US is not concerned.   Finally, I heard from a local trucking company about delivery to my home, (took 3 days) the appointment was made and now I have my kits.  

The most up-to-date information was from the American Airlines Cargo website.  Once the shipment was in their hands it was tracked, but a lot of the status reporting was cryptic.  I did have the option of Air vs Sea, but as screwed up as US ports are right now, there was no way I was going to let my toys sit in a container for a couple of months.  

UN-PACKING

There was about a mile of shrink-wrap around the pallet, and it had been undisturbed during transit, so no close inspection (maybe they x-rayed it?).  Once unwrapped, I found each kit, some in multiple boxes, to be labeled and securely taped, not with ordinary tape either, but hard-core strapping tape. 


I opened each box, and cut off flaps. In some cases I cut the boxes down to about 1/2 height. The idea is to keep each kit intact until I need it.  With the way the shipping department so expertly taped the boxes, they became very sturdy "trays" from which to work.

FITTING INTO MY WORKSPACE

I mentioned in an earlier post, that my allotted workshop space was 1/2 of a two car garage.  So since I only had a 1-day "rental" of the other 1/2, I needed to fit the kits into safe storage during the build.  

Luckily STW provided an excellent pallet for me to work with.  Made of hard plastic,  It was very sturdy and I was able to trim it down to 1/2 width.  Then I put it on 4 - 3wheel castor bases, which gives me a way to move the pile around as needed.  

In my workshop, I have a number of 4ft x 4ft "lifts", each with about 300lbs capacity.  I had cleared one off in anticipation of this project, and used it to hold the tanks and the body frame parts which are some of the later kits. (also the most bulky for now). 


 END OF DAY 1

I could not resist the urge to put the chassis together and see if it would fit in my space.  It is going to be tight, but doable.  Specially when the wheels are on.  Here is the chassis on the stands. 


And finally,  here is a view from the open garage door.  The lift is up above the door.  The pallet on casters is on the lower left.  The large tool box on the left and the pallet can be moved.  You can see another lift straight ahead that has a bunch of large clamps hanging from it.  Thee is also a 2-ton hoist right above where the boiler would/will be.


So - tight but workable.  

Now I need to haul dirt to pay my rent for the use of the other 1/2 of the garage.   We are celebrating our 48th year this month, so it is not really a high price to pay given how much she puts up with when it comes to my "projects". 


More to come - I will get a lot of pieces ready for the powder coater, so far I see nothing to concern me at all.  


Regards,

Poppapope