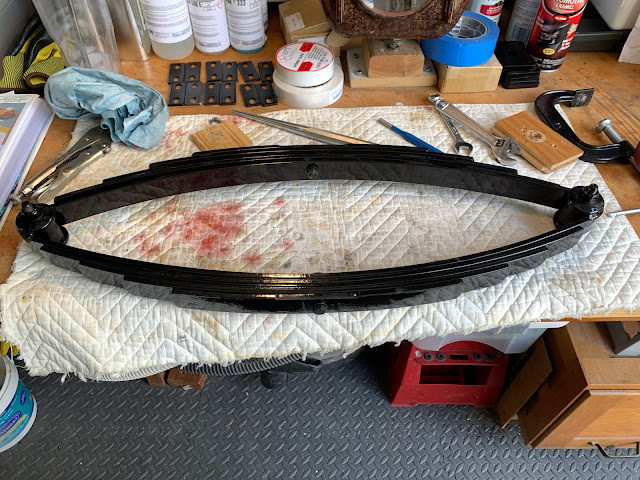
Assembling the Leaf Springs
I got the spring sets back from the powder coater. Very nice looking. Each set is made up of a "base pair" plus 4 leafs, top and bottom. STW had pre-assembled the sets and after taking them apart, I got down to the base pair. I decided to NOT separate those, as the bolts and bushings were "very happy where they are." The folks at the powder coater were very careful and did a great job on them, giving me a really nice starting place.
When I got the first set together, and did a trial fit to the chassis, I noticed that the first (smallest) leaf was a little too wide for the mount. I chose to grind down the leaf rather than the mount. So I took about 1/8" off one side until there was an easy fit in the slot. I kept one side un-touched to provide a way of perfecting the alignment with the chassis.
So you can see above that I added some Dome Nuts to the leafs - First as a cosmetic and then since I did not like the extended look, I removed the first nut, ground down the bolt and kept the dome nut alone (with washer).
Then I had an extended discussion with Grier, make sure you see his blog, and we discussed the clearance issues he found between the leaf springs and the water tanks on his car.
This resulted in some modifications -
1. Rotate the springs so the flat head of the main bolts face outwards. On his Lyka he had the bolts inward, and they scraped the tanks on heavy bumps.
2. While the lower leafs had the U-Bolts as shackles to keep the leafs from spreading, I fabricated brass bands for the top leafs to accomplish this. They may turn out to be too light weight, but time will tell.
Parking Brake
The Parking Brake is a band that clamps around the differential. You need to glue/attach the band material to the inside of the metal band, then secure the assembly around the differential on the chassis.
The band ready for adhesive.
I used construction adhesive and then every strong clamp I had.
Let it set for 48 hours, then tried to fit it around the differential.
It took a fair number of grunts and groans, but here it is in place, with a temporary bolt to keep it from "un-springing."
The actual linkage for use will go in later in the build.
The Calipers are next,
Thanks for reading,


No comments:
Post a Comment
Thank you for posting your thoughts on my build.